Three Position Switch Panel Installation
 This
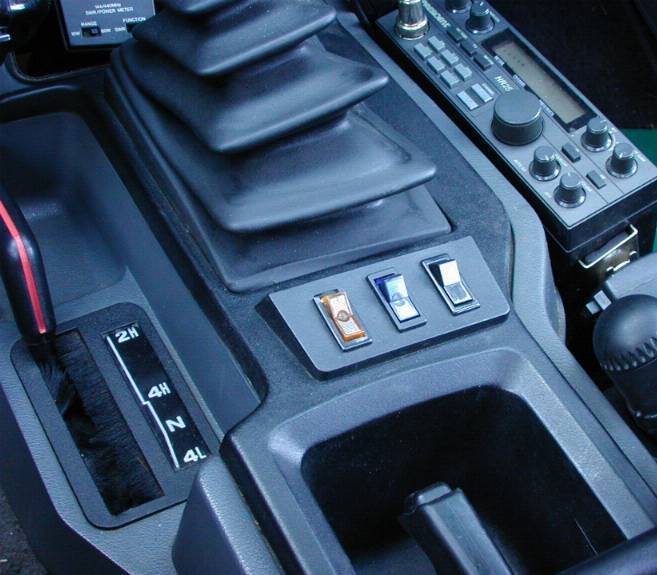
common after market three position switch panel is just the right size
to completely cover the coin holder.
This
common after market three position switch panel is just the right size
to completely cover the coin holder.
The switches control three separate relays,
left to right:
Rear Auxiliary Backup Light;
Auxiliary Cooling Fan;
Accessories Package (radios, inverter, extra
12 volt outlets).
 The
black sheet metal screws that secure it in place are barely noticeable
until you lean forward and view the panel from the top.
The
black sheet metal screws that secure it in place are barely noticeable
until you lean forward and view the panel from the top.
 To
install the switch panel I removed the console and cut out the bottom of
the coin holder with a hacksaw. It doesn't have to be neat because it can't
be seen when the panel is in place. Cutting only the bottom out provides
clearance for the switches and wires, and leaves enough of the coin holder
to attach the bracket to. I used a piece of scrap sheet metal that
I trimmed to the inner width of the switch panel mounting area and notched
out each side to fit into the coin holder. I bent it in a vise to
match the two angles then attached it with two sheet metal screws.
To
install the switch panel I removed the console and cut out the bottom of
the coin holder with a hacksaw. It doesn't have to be neat because it can't
be seen when the panel is in place. Cutting only the bottom out provides
clearance for the switches and wires, and leaves enough of the coin holder
to attach the bracket to. I used a piece of scrap sheet metal that
I trimmed to the inner width of the switch panel mounting area and notched
out each side to fit into the coin holder. I bent it in a vise to
match the two angles then attached it with two sheet metal screws.
 As
you can see there is plenty of room for the switches and the wires to extend
down into the console. Notching the mounting holes in the switch panel
allows it to fit tightly against the console while you tighten the screws.
This provides perfect alignment and eliminates the need for precise hole
placement.
As
you can see there is plenty of room for the switches and the wires to extend
down into the console. Notching the mounting holes in the switch panel
allows it to fit tightly against the console while you tighten the screws.
This provides perfect alignment and eliminates the need for precise hole
placement.
 When
it's all put together it has a near factory appearance and the location
is very convenient. Unfortunately the amber switch was a cheap Taiwan product
and the bezel cracked on installation. I have since replaced it with one
of higher quality.
When
it's all put together it has a near factory appearance and the location
is very convenient. Unfortunately the amber switch was a cheap Taiwan product
and the bezel cracked on installation. I have since replaced it with one
of higher quality.
Questions or comments can be sent to:
dch@olypen.com

A Wizard
of
Wiring
Production
WoW
®
2001